

You want to have that glowy makeup look that is on billboards and in a fashion magazine. You have tried almost everything, from reducing your junk food intake to drinking more water and juices, but it is still not giving that ultra-glam look. So as you keep on waiting, thinking you will get old and never get that look, we are here to help. I hope you also checkout the Last makeup academy lesson on how to apply eyeliner. In this blog, we will give you step-by-step methods on how to apply highlighter.
Read till the end of the Makeup Academy #3 lesson to learn all the tricks of applying the highlighter. But before we begin the steps, let's learn a few things about highlighters.
Table of Content
- What is a highlighter?
- Different Types Of Highlighters
- Where To Apply The Highlighter?
- How To Apply Highlighter Step-By-Step?
- Frequently Asked Questions (FAQs) on Highlighters
- Wrapping Up
What Is A Highlighter?
Highlighter is a cosmetic product that has been specifically developed to reflect light. Makeup artists use Highlighters on the face and different parts of the body to create a perception of depth and angles and brighten the given area.
Different Types Of Highlighters
In the market, there are different types of highlighters with different consistencies. Therefore, it is essential to know them to select the correct one. Here are five different types of highlighters.
1. Strobing Cream

Strobing cream is the perfect highlighting option when you want to give the vibe of glowing skin from within. It is a radiant primer or moisturizer used all over the face and where you want a soft natural glow. Strobing cream must be applied on the face before or by mixing it with the foundation.
2. Stick Highlighter

Stick Highlighter generally has beeswax or paraffin as a base that works perfectly for beginners. The thick crayon-like stick is easy to use with precision, and the shape is ideal for applying to the highest points of the face. It can also be applied to the eyelids to highlight the area and can be blended well with the fingertips.
3. Liquid Highlighter

Liquid highlighters are available in a glass or a plastic bottle with a dropper. It can be mixed with the foundation to get the glow of a goddess. Since most of them are infused with natural and essential oils, it gets absorbed by the skin easily and lasts long. It is a perfect option for people with dry skin.
4. Powder Highlighter

A powder highlighter is your best friend if you have oily skin. It looks like a compact powder and must be applied with a fan brush after completing the makeup. People with dry skin can also use it, but they need to ensure to moisturize the skin first and that there are no fine lines or dry patches with the highlighter. It can also be used on the inner corner of the eyes.
5. Brick Highlighter

It can be your go-to highlighter product when you are unsure which type to use since it is perfect for all skin types. The powder is pressed with a micro-shimmer and has rows of separate colors. You can combine all the colors to get a custom highlighter or use each block as a blush or bronzer. It also can be applied as eyeshadow.
Where To Apply The Highlighter?
Are you wondering where and how to apply a highlighter for beginners? Well, don't fret anymore. We will share the eight strategic places of the face where you should use the highlighter to get the glow for any Indian skin tone.
1. Cheekbones

The most common place to use a Highlighter that gives a lifted appearance to the face is by applying it on the cheekbones. Dab a light layer of the highlighter on the cheekbones and drag it to the temples to give a natural look. Remember to blend it well to avoid any stark lines.
2. Bridge of the Nose

The highest point of the face is the bridge of the nose. The use of a DE'LANCI NEW 6 Color Highlighter Palette is to reflect the light from the highest point; hence applying it to the bridge of the nose makes sense. But remember to blend it well so no stark lines run down the nose.
3. Cupid's Bow

The curved section on the upper lip is the cupid's bow. Again, you can apply the highlighter to give your lip definition and a fuller appearance.
4. Brow Bone

Add brightness to your face with a touch of highlighter on the brow bone. It is one of the vital areas of the look that catches the light, so it makes sense to highlight this integral part of the face's bone structure.
5. Inner Corner Of Eyes

Give your eyes a wider appearance by adding a touch of highlighter on the inner corner of the eyes. One area tends to be in the darkness, so brighten it up with the product.
6. Under Eye Area

Often this is an overlooked area, but it is too prone to be in the dark like the inner corner of the eyes. So, apply a light layer of highlighter in the area after putting the concealer to brighten the eyes.
7. Centre of Eyelids
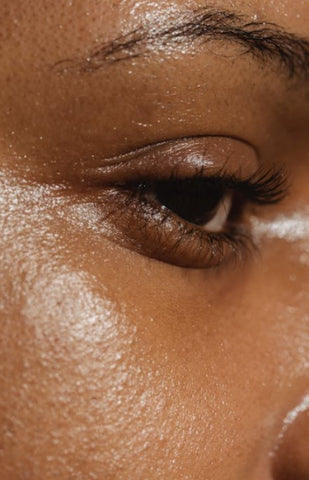
If you opt for a natural look, then adding a bit of a highlighter to the middle of the eyelids can do wonders. It will add a glow to the entire skin while brightening the eyes. But avoid using it if you aim for dark smokey eye makeup. Read the article by our makeup experts on eye makeup guide.
8. Centre of the Chin
Do you have an oval or longer-shaped face and want to make it look round? The best way to achieve it is by applying the highlighter on the chin. But remember to blend it well so it looks natural.
How To Apply Highlighter Step-By-Step?
Highlighter can be your best friend when you apply it correctly. So if you are thinking about how to apply a highlighter for a natural look, these easy steps will help you. The key to using a highlighter while finding the right shade and type of highlighter is to be minimalistic with it. The last thing you want is to look like a plate of glitter.
Step 1: Clean the face

Clean your face well and dab it dry. There shouldn't be any leftover makeup, dirt, or oil on the skin. You can apply a scrubber, too, to get rid of any dead skin. Dab it dry.
Step 2: Hydrate the face

Before applying any makeup, remember to hydrate your face well and also checkout the basic makeup for beginners. Your skin should not get parched, so apply a moisturizer suitable for your skin.
Step 3: Creating the canvas

Treat your face and wherever you will be applying the makeup as a canvas. Apply a layer of primer to get a clean and smooth base for applying the makeup.
Step 4: Prepping the face

This step is essential to get your makeup right and for the highlighter to work correctly. Apply a skin-appropriate foundation. Add a bit of the highlighter to the foundation for a natural glowy look and apply it over the face. Let it sit for a while, and then apply the concealer.
Step 5: Time for the Highlighter

Now that the base is done, you can use the highlighter with a sponge or brush, depending on the formula. The areas where you can use our cheekbones, browbones, cupid's bow, bridge of the nose, and chin. You can also refer to the earlier section on where to apply the highlighter.
Step 6: Using the Right Tools

When you are using a liquid or powder highlighter, using the right makeup brush is essential. Mainly when applying it to the inner corners of the eyes. Switch from a fan brush to a fine-tip brush for precise application on the corner of the eyes and the bridge of the nose.
Step 7: Blend Well

Irrespective of the Highlighter you use, you last want to have streaks on your face; blending the product well is the best way to prevent it.
Step 8: Setting Spray

Now that you have applied the highlighter, you must ensure it stays. The best way to do that is by using a setting spray.
Pro Tip: How to apply liquid Highlighters?
All you have to do is take a few drops of the highlighter and put it on the high points of your face and the places you want to reflect the light. Next, blend it well with a brush or sponge. Checkout the in detailed guide on different types of brushes and their uses to get the perfect results.
Frequently Asked Questions (FAQs) on Highlighters
1. Who can use a highlighter?
Anyone can use a highlighter the key is to select the correct shade, which is two shades lighter than the skin tone, and it must have the right undertone.
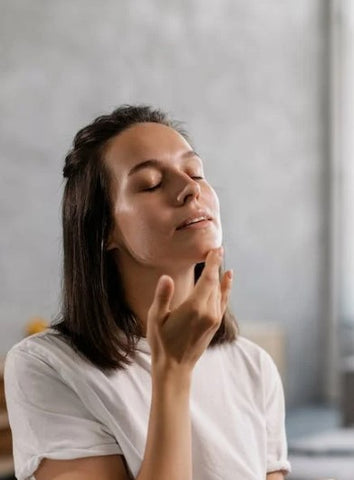
2. Can a highlighter be used without makeup?
Of course, it can be used without going all out with makeup. It is one of the best ways to highlight the features of the face while maintaining a natural appearance. All you have to do is apply it in the same way you apply the foundation and, as required, build it up.
3. What to do if I have oily skin?
When you have oily skin, find a powder highlighter or a product that helps with oil control. For example, if you use an oil control foundation, you can use the highlighter, which will stay long. Also, spray the face to keep the highlighter in place. But remember to stay away from cream-based highlighters.
4. Where can I find the right highlighter for south Indian skin tone?
If you have a dusky complexion, the best place to find the highlighter is with us. De'Lanci has created a highlighter that is just for the dusky skin tone.
5. When should I use a highlighter?
You can use a highlighter whenever you go out or want to give a natural glow to your face. It can be done with full makeup or just a little bit of the highlighter to have a dewy look.
Wrapping Up
This is the end of makeup tutorial #3 on applying a highlighter. In this tutorial, we learned four essential things:
- Areas where to apply the highlighter
- Different types of highlighter and the ones which suit the skin type
- The steps that we should follow to apply a highlighter perfectly
This session is perfect for anyone who wants to learn the details about highlighter and how to use it. But we are not leaving you like that. So instead, here is some more information on De’lanci highlighter Palette and on international makeup products.