

Hey there! Hi. Are you ready for the tutorial on basic makeup for beginners? We know you were waiting so long for this. So, in this article, we will help you familiarize yourself with makeup essentials and how to do simple makeup as a beginner. And stay till the end to get the answers to your basic makeup-related questions.
But first, what is makeup?
An informal definition is a thing that helps you feel confident enough to do a stage performance in front of thousands. And if we go for the formal definition it is, “materials used in changing a performer's appearance.”
The existence of makeup dates back to the 1st Dynasty of Egypt. Women at that time would decorate their eyes (now we call it eye makeup) with the application of green color to the under the lid, and black color to eyelashes and upper lid.
In the 1st century AD, Romans applied makeup with coal (as kajal, mascara, and eyeliner), chalk (as a foundation to whiten the face), and rouge (as a blusher to add colors to the cheeks). Ancient makeup was vegan and cruelty-free.
Even products from De’Lanci are cruelty-free and sensitive skin-friendly.
Before you start learning the basics of makeup application, you need to know about the cosmetic products and other essentials needed to do the makeup. This list will help you in creating your makeup kit as well.
Makeup Products Every Beginners Need
The makeup products we are mentioning here are the basic ones that you will need for your makeup academy chapter 1: Basic Makeup for Beginners. Whether you want to go the natural makeup look or the light makeup look, this guide will help you out.
Or han, aap issey “How to apply light makeup for beginners” bhi samajh sakte hai, thik hai?
So, let’s start and pay attention!
1. Primer

Think of primer as a layer between your skin and makeup products, it keeps your skin safe from harmful chemicals makeup products may have. Or you can also consider it as a staple that creates a smooth base for makeup products and make them last longer.
Primer is an essential part of the makeup to make it last longer and for your skin as well as to protect it.
2. Makeup Brushes and Sponges

Think of makeup brushes and sponges as the tools to apply the products on your face flawlessly. There are different types of brushes available for each product and technique. Confused?
For highlighter, there is a fan brush, and for foundation, there’s a kabuki & stippling brush. There are different brushes for blending, applying lipstick, and doing eyebrows. Don’t worry, you can find them all here.
3. Foundation

The name itself suggests the function of the makeup product. The foundation is for doing the groundwork or creating a base for other makeup product applications. The foundation evens your natural skin tone and sometimes can change it as well.
Nowadays, the foundation can act as sunscreen and can even blur the blemishes as well. It comes in cream and powder form.
4. Concealer
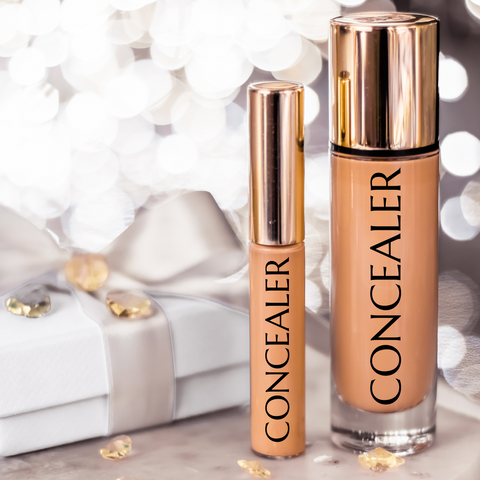
Conceal the flaws and blemishes with the help of a concealer. Whether you have acne, dark circles, dark spots, pimples, or any imperfection, the concealer will hide them all away. There are different shades in concealers that do different work.
The most commonly used is the skin-colored concealer to hide dark circles, blemishes, age spots, and large pores. It is also known as a color-corrector.
5. Translucent Powder
This makeup product won’t add any color to your skin, instead will set the makeup well on the skin. You can also use the translucent powder to give the matte effect and control the shine of the makeup.
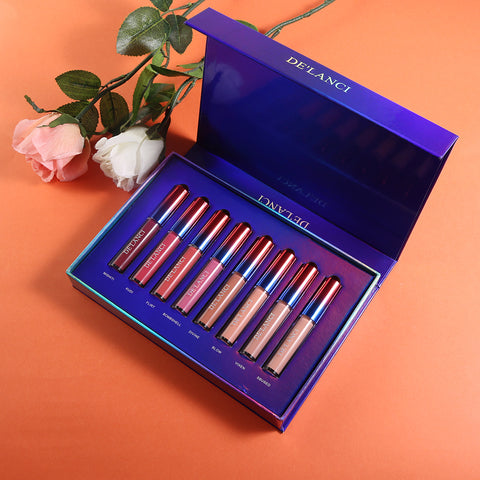
6. Eyeshadow Palette

The most hyped and loved makeup product is the eyeshadow palette. Here at delanci, we truly believe in “Eyes says it all.” And you can figure it out by taking a look at our eyeshadow palettes.
The eyeshadow palette is used to add color to your eyelids and make them look attractive. When you pick one, make sure it is highly pigmented, blendable, easy to use, and also easy to remove.
7. Blusher Palette

Another product that girls love is blusher. Blusher gives your cheeks that nice color. With the help of a blusher, you can create a look of a natural flush or one that looks like a flush.
Still didn’t get that?
Think about your crush!
The pinky and puffed-up cheeks you have right now are a flush, and with blusher, you can imitate that look.
8. Highlighter Palette

A highlighter, as its name suggests, highlights the face. The highlighters are light-reflective makeup products. It makes your skin brighter, gives a dewy glow, and enhances cheekbones making them look defined.
Apply highlighter to your high points - cheekbones, forehead, nose tip & bridge, cupid’s bow, chin, and brow bone.
9. Lipsticks
Lipstick in makeup products is like the cherry on top. It makes your final look perfect. The purpose of lipstick is to add color to your lips and make them look attractive. They come in solid, liquid, and creamy forms. The latest trend is powder lipstick.
There are different types of lipsticks available from matte, shiny, glossy, to satin and tinted lip balm.
10. Makeup Fixer / Setting Spray

The last but not the least product is makeup fixer. You will need to fix your makeup in place. And that you can do with the help of the makeup fixer or the setting spray. Once you are done with the makeup application the last step is to use it. It will keep your makeup as it is for a longer time.
These are the basic makeup products that you will need to learn the basic makeup for beginners. Now without wasting much time let’s move ahead and learn natural makeup step by step.
Application of Basic Makeup for Beginners
Step 1: Apply Moisturizer and Primer

The very first step is to prep your skin. Once you have washed your face thoroughly, apply face moisturizer and sunscreen. Then dab a few dots of primers on the face and apply it all over using a brush or your hands.
As said earlier, the primer will create a smooth base. Once you have applied, touch your face and you will see how smooth your skin is after that.
Step 2: Dab Few Dots of Foundation

Once you have applied the primer, it is time to create a foundation as in base for the makeup. Pick the foundation and dab a few dots on the face. Now using a brush or sponge spread it all over the face with a tapping technique.
Make sure to cover all the areas, take some more product if needed. You have to tap it and apply it on the face till it settles down in the skin, for a flawless look.
Step 3: Conceal the Flaws with Concealer

Next, it’s time to conceal all your flaws and blemishes from the face. Take the concealer on the back of your hand, nicely warm it up. Then apply it under the eyes and tap it with a sponge till it settles in and doesn’t pop out.
Then do the same procedure on all your dark spots, age spots, and blemishes. When you apply concealer under the eyes, take it slightly upwards on the side for the defined look.
Step 4: Set the Base with Translucent Powder

Once you have applied foundation and concealer, you have created a base for other makeup products. From step 1 to step 4 the process will be the same no matter what look you are going to create.
Now take the translucent powder and apply it all over the face with a brush. It will help the base to settle and stay in the place for a longer time. Press the translucent powder into the skin and especially on the areas that get more sweaty.
Step 5: Do the Eye Makeup

This one’s a bit lengthy, but the most important part of the makeup. Add color to your eyes using an eyeshadow palette. If you are a beginner, you must try our 35 color eyeshadow palette or the mysterious queen one. Do not worry! Each palette is newbie-friendly.
Today, we will learn the easiest eyeshadow application. In upcoming chapters, you will learn how to do smokey eye makeup, graphic look, and much more.
Step 5.1: Prime Your Eyes
The step of eyeshadow application is priming the eyes. The purpose is the same, to protect and create a smooth base.
Step 5.2: Apply Concealer and Base Shade
Then, apply concealer on the eyelids to smoothen the surface and hide flaws (if any). When you apply concealer on the eyelids the eyeshadow will stay for a longer period.
After that to set everything in place, apply the base shade. For the color, you can go with the one that matches your skin tone.
Step 5.3: Pick the Shades As Per Outfit or Occasion
When you pick up the shades, make sure it goes with the outfit or the theme you are going for! If you want to keep it simple go for nude shades. However, if you want to create a bold look, go with brighter colors.
Pick the medium-tone shade and blend it over the crease and softly towards the upwards to soften the edges.
Step 5.4: Apply Darker and Shimmer Shade
Now pick the darker shade and apply it to the outer corner. Using the blending brush blend both dark and transition shades for the smooth gradient effect.
And coming towards the mid area of the eyelids. This is the perfect spot to add the shimmer shade. You can pick the one you like and tap it with your fingers or the brush. Then slightly blend it for a smooth look. Don’t forget to highlight the inner eye corner!
Step 5.5: Glide Eyeliner on your Eyelids
Applying eyeshadow isn’t enough! You need to add eyeliner as well. If you know how to apply equal winged eyeliner you can go for that, and if not, apply the simple one.
There are many types of eyeliner, but as this is the start of the journey, we will keep it simple. Use an eyeliner pen and glide it across the edge of your eyelids.
Step 5.6: Apply Kajal on Under Lids
Don’t forget to add your Indian aesthetic - kajal. It won’t only make your eyes look beautiful, but will also save you from “Buri Nazar.”
Apply kajal on the waterline of your eyes. Even kajal comes in different colors. As we are going for a natural makeup look, we can choose from black and white. Pick the one you like.
Step 5.7: Give Volume to Your Lashes With Mascara
Apply mascara for thicker and fuller lashes. Mascara won’t only add volume to the lashes but also your overall look. If you don’t have fuller lashes, you can go for adding fake eyelashes as well! (We will learn about fake eyelashes in another chapter!)
Now, your eyeshadow is done. But look for product fallouts or smudges on the face. If you see one, remove it using Q-tip. Always keep the Q-tip handy while applying makeup, now and forever.
Step 6: Add Color to the Cheeks
Let's make your face look like the one you see when you think about your crush. Yes, the blusher. There are different techniques to apply blusher. We will go with the most common one - Smile and apply.
Pick the blusher shade with a brush, tap the excess product off, then smile to get your cheeks all puffed up. Now, apply the blusher in a circular motion and take it upwards along the cheekbone.
Next, clean the brush on your skin or the paper and smoothly blend everything together in the area. This will make sure that there’s no excess color on the face and will give a natural look.
Step 7: Highlight the High Points of Your Face

You know about the high points. We already discussed it above. Now, let’s see how to apply a highlighter. Take a fan brush, pick a highlighter and apply on your high points. Be gentle with the application. The highlighter should go in the exact amount, neither less nor excess for the perfect glow and definition.
Step 8: Swipe The Lipstick For Perfect Pout

For the first chapter, we won’t pick a liquid or lipstick palette. Let’s keep the traditions going. You are allowed to pick the shade you want, but as per your skin tone. Look at the image for a guide on shades to pick:
Before applying the lipstick, go for lip balm for protection. Define the lips with lip liner, then apply lipstick moving outwards from the center of your upper lip and finally sliding it on the lower lip. Use tissue paper to remove excess product.
Step 9: Set the Makeup With a Setting Spray
You can complete the makeup, now all you have to do is fix it and slay the look. Spray the makeup fixer or setting spray to fix the makeup in place for hours.
Now, you can enjoy the real party!
Tips for Basic Makeup for Beginners
Here are some additional makeup tips that will help you get the flawless and chic look that will leave an amazing impression on everyone:
#1: Tapping is the key to a smooth base. So remember, just tap, tap, and tap. There should be no rubbing at all.
#2: Make sure your brushes are always clean, as dirty brushes will ruin the makeup application and you may get allergic reactions. You should wash them weekly once (at least).
#3: While blending any makeup product, go with circular motion only.
#4: Always exfoliate your lips before you start makeup and apply lip balm before lipstick.
#5: You can use sunscreen as well instead of moisturizer as it has SPF. It will protect your skin.
#6: Get the foundation that suits your Indian skin tone. You can take the help of personnel at the store or check the shade guide online.
#7: As a beginner, you should invest in an eyeshadow palette with matte, shimmer, and even metallic shades.
#8: If you don’t want to keep different palettes for different purposes, you can also go for an all-in-one makeup palette.
#9: Just like foundation, the shades of highlighter, and blusher should also be as per your skin tone.
#10: Don’t forget to highlight the inner eye corners. It will make your eyes look brighter and prettier.
End of Makeup Academy’s 1st Chapter: Basic Makeup for Beginners
So, here we are at the end of our 1st chapter - basic makeup for beginners. In today’s class we learnt three things:
- Things needed to create a basic makeup kit for beginners,
- Application of makeup for beginners’ natural look, and
- Tips on the application of basic makeup for beginners.
All in all, this chapter is a perfect one for someone who is a newbie in the world of makeup. The makeup application and product we learned about are just the starts. There are other advanced-level makeup products and techniques as well like contouring, bronzer, and much more.
But we will move ahead step-by-step. Just like we studied the natural look step by step, we will learn everything about makeup Dheere Dheere.
Tab tak, follow us on Instagram and Facebook to get updates on the makeup industry, our products, and Makeup Academy’s 2nd Chapter.
Before we finish this up, as promised here are answers to all your general queries:
FAQs About Makeup Application
1. Is there a certain order to apply makeup?
Yes, there is! You should always make a base and then apply other products. Follow the step-by-step tutorial we showed for the perfect and flawless look.
2. Which foundation shade should I go for?
The foundation shade should always be as per your skin tone. It shouldn’t be the exact match, instead one or two shades lighter.
3. Can I buy any makeup products?
No, you shouldn’t buy any makeup products. Always look for the quality as some makeup products might have chemicals that will ruin your skin. Here at delanci, we have makeup products that are suitable for every skin type including sensitive ones.
4. Is it necessary to prep your face before makeup?
Yes. always prep your face before applying makeup, it is one of the essential tips for basic makeup for beginners. It is good for both your skin and the final result of the makeup.
5. Can I use compact powder instead of translucent powder?
No, you can’t. There’s a difference between compact and translucent powder. The compact is heavier and tinted while the latter one is lighter and colorless. The translucent powder fixes the base and compact creates one!